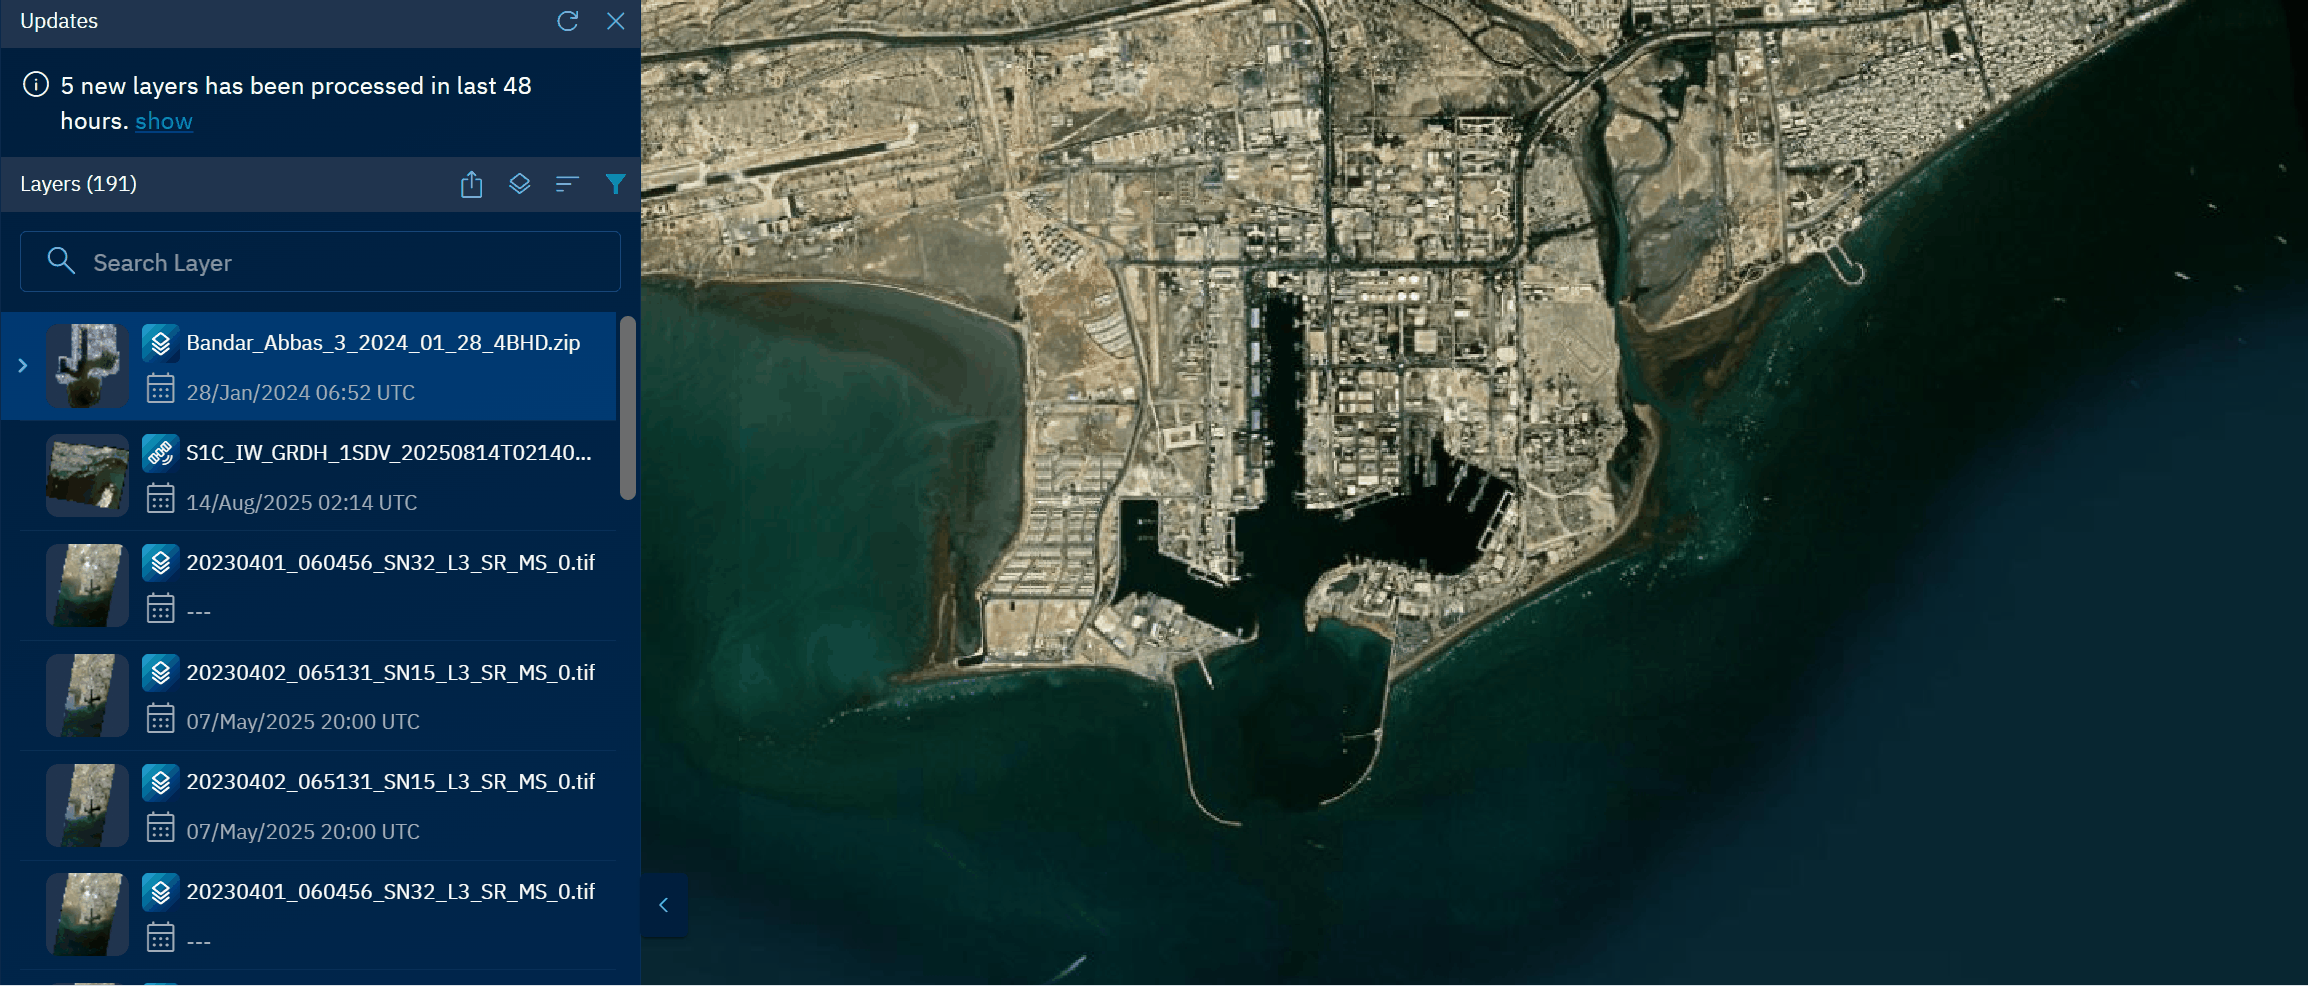
Selecting Layers
In this section, you will learn how to access the More Options menu of a layer to use following options:
-
Run AI Model
-
Zoom into Layer
-
Share
-
Perspective View
-
Georeference
-
Export
-
Open in File Manager
-
Add to Workspace
Run AI Model
Run an AI model right from the Layers panel in the Explore module.
You can run an AI model from the Layers panel in the Workspace module too.
To run AI model, do the following:
-
On the Explore module, locate the layer on which you want to run an AI model.
-
Click the More Options menu and then click the Run AI Model option.

The Run Models contextual panel is displayed.
-
In the Run Models panel, under the Run Models areas, do the following:
- Select an AI model from the Select Model drop-down list.
- Draw an AOI or select an AOI from the AOI Library or copy-paste a WKT
- Click the Run button.

The AI Model job is successfully submitted.
-
In the Run Models panel, under the Detections area, do the following:
-
View the number of detections.
-
Download the detections.
-
Filter the detections.

-
In case you want to download the detections, click the Download icon to save the detections on your local computer.
Zoom into Layer
Get a closeup view of the layer on the map with zoom into layer.
To zoom into a layer, do the following:
-
On the Explore module, identify the layer that you want to have a closer look.
-
Select the layer, click the More Options menu, and then click the Zoom into Layer option.
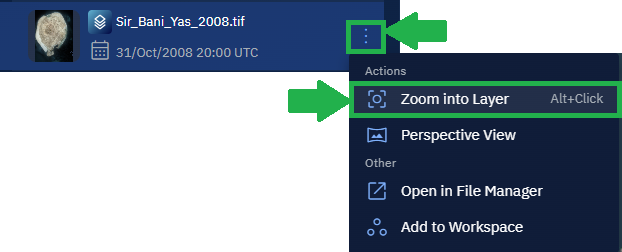
The platform zooms into the layer displaying all the details of the area on the map.
Share Layer
Share a layer with any organization in your environment or tenant. In the current release, only one layer can be shared at a time.
Once you share a layer, it is displayed in the Layers panel under the Explore module in the platform owned and governed by the organization.
Pre-requisites:
As a Super User of the platform, you must enable the following:
-
Data Sharing for the Organization: Create a new organization or locate exisiting organizations with whom your organization regularly shares data. Once the organization is located, then you can enable the data sharing capability of your orhganization. For more information, see the chapter on Creating an Organization.
-
Permissions of the Role: Create new roles or locate existing roles in the organization who need to share layers with other organizations within the environment or tenent. Once you locate the role, then you can enable Data Sharing permissions for an existing role or role you have just created. For more information, see the chapter on Roles.
To share a layer, do the following:
-
On the Explore module, identify the layer that you want to share.
-
Select the layer, click the More Options menu, and then click the Share option.

The Share Layer dialog box is displayed.
3 . In the Share Layer dialog box, select the organization or organizations with whom you want to share the layer, amd then click the Share button.
The layer is successfully shared with the organization.
Perspective View
View map in perspective view along with the contextual details panel.
To open a layer in file manager, do the following:
-
In the Explore module, search or identify the layer that you want to open in file manager.
-
Select the file, click the More Options menu, and then click the Perspective View option.
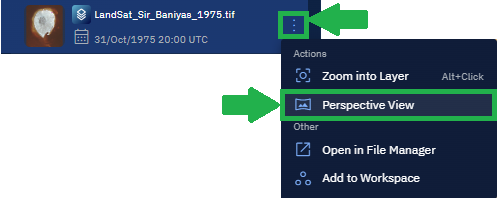
The platform displays the layer in perspective view.
Georeference
At times, the images received are not properly georeferenced, that is, images do not have the appropriate spatial metadata required to align with a map or local coordinate system. Standard raster images (like a basic TIFF or JPEG) are 'grid of pixels' with no inherent knowledge of where they belong on a map.
You can use the georeferencing feature to "pin" those grid of pixels to a real-world coordinates of a specific location on a map.
To georeference an image, do the following:
-
On the Explore module, identify the layer that you want to have a closer look.
-
Select the layer that you want to georeference, click the More Options menu, and then click the Georeference option.

Georeference functionality opens in a new browser tab, allowing you to establish a relationship between the pixel grid and real-world coordinates.
-
In the Georeference tab, click to pin the pixel and geographic coordinates for a specific location. Repeat this step until you have 10 different ground control points.
-
In the Output Filename field, type a new name for the output file, and then click the Georeference button.

The platform starts the process of georeferncing the image. Once the process is completed, the image is displayed in the Explore --> Layers section.
- Click the image layer and open to vview and verify the georeferencing.
Export
Open Layer in File Manager
View the layer in a file manager to see the AI models run on the layer, delete the file from the platform, and download the file on your local machine.
To open a layer in file manager, do the following:
-
In the Explore module, search or identify the layer that you want to open in file manager.
-
Select the file, click the More Options menu, and then click the Open in File Manager option.
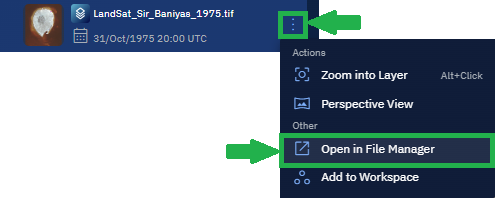
The platform displays the layer in file manager.

Add Layers to Workspace
This section presents information about how you can add layers to a workspace.
At times, you may want to add a specific layer to a workspace to help you visualize and/or analyze better. You can add all types of layers to a workspace without any pre-conditions. However, when you add a specific layer to a workspace, it is recommended that you access the workspace – where you added the layer – and verify the layer is available.
See the Types of Layers section to know the layers you can add to a workspace.
Pre-requisites
- You are only permitted to add layer or layers to a workspace that you own, or you have created
- You are only permitted to add layers to a workspace you have access to as a group member.
To add a layer to a workspace, do the following:
-
In the Explore module, locate the layer that you want to add.
-
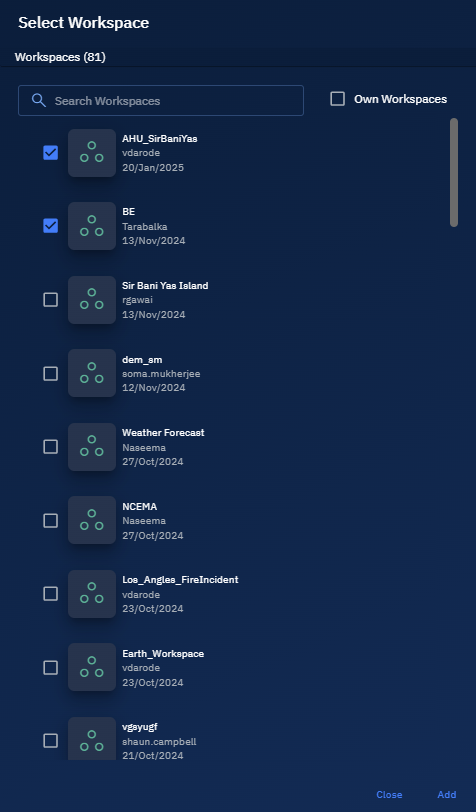
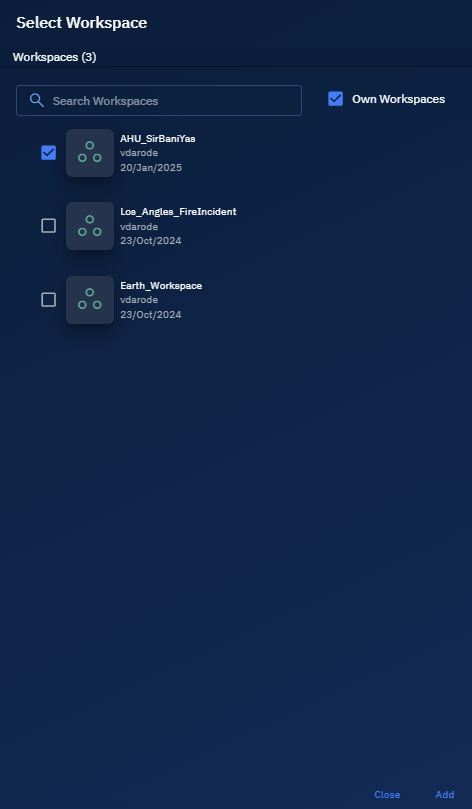
Select the specific layer, click the More Options menu, and then select the Add to Workspace option.
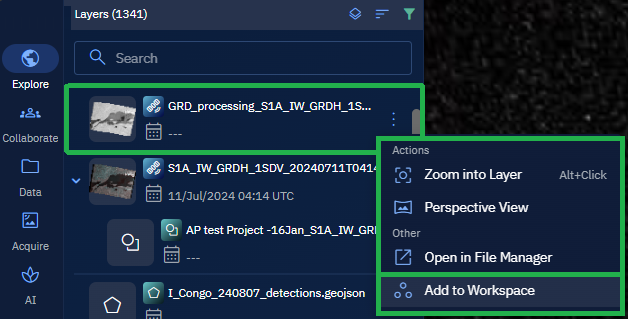
The Select Workspace dialog is displayed.
-
In the Select Workspace dialog, do one of the following:
-
Select the checkbox of workspaces where you want to add the layer.
-
Select the Own Workspaces checkbox to filter workspaces owned by you and then proceed to select the checkboxes of the workspaces.
-
-
Click the Add button to add layer to the selected workspace.
The current storage quota limits are based on your subscription tier.
Before uploading datasets, it is recommended that verify your organization's available storage quota. Exceeding the storage quota may automatically trigger premium overage charges. Contact your Administrator to adjust storage quotas or modify subscription tiers before reaching capacity limits.
Toggle Layer Visibility
Turn on or turn off the layer visibility on the map in one, single click.
To toggle layer visibility, do the following:
-
In the Explore module, locate the layer that you want to visualize on the map.
-
Click the Eye icon of the layer to turn on the visibility of the layer.